– To know more about Epson WF-C579, WF-C529 Operating Principles, click here
– To know more about Installation on Epson WF-C579, WF-C529, click here
Overview
Service support mode is a service dedicated special mode that can be started by a special operation. This mode allows you to execute functions including Individual Action Check that you use when troubleshooting, the adjustment and inspection after replacing parts and the firmware update using the USB flash drive etc.
NOTE:
- By turning the Cover Open Sensor off, service support mode can be performed in the state that the ADF/SCN Unit is not connected.
When starting service support mode without ADF/SCN Unit connected to the printer, make sure to push down and secure the lever of the Cover Open Sensor (turning the sensor off) with a piece of tape or the like.

- After performing A02 CR Unlock Power Off of Individual Action Check: MENU or B90 Printhead of Before Repair Operation: MENU, left outside cap error occurs when rebooted the printer in service support mode and perform adjustment or action check.
This error occurs when the CR Unit is not at the home position when the printer is turned on. Since the CR Unit is moved from the cap because of the process written above (CR unlock), no error is occurring to the printer.
Therefore, press the OK button to cancel left outside cap error.

– Connect Wi-Fi for Epson WF-C579, WF-C529, click here
– Epson WF-C579, WF-C529 IP address Settings, click here
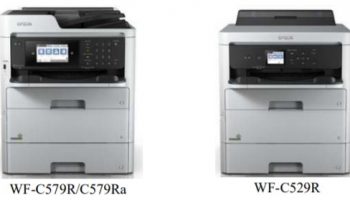
Epson WF-C579R, C579RA, C529R Service mode startup
For Epson WF-C579R/C579RA
1. Press and hold down the power button while pressing the [#] button from the power-off state until a message appears on the panel LCD.

")
2. Enter ID number of Service Support Mode, and start the service support mode.
CHECK POINT:
- Enter “89109” when starting service support mode.
- Operating procedure
- Number input (move in ascending order): [2] button
- Number input (move in descending order): [8] button
- Input digit shift: [6] button
- Execute: [#] button
")
# ID number input procedure:
- STEP 1. Press a number input button ([2] button or [8] button) to enter a number from 0 to 9.
- STEP 2. Press the input digit shift button ([6] button) to shift to the next digit.
- STEP 3. Repeat the above procedure to enter the specified ID number.
- STEP 4. When all of the ID number is entered, press the execute button ([#] button). A confirmation message appears.
- STEP 5. Press the execute button ([#] button) to execute or press the input digit shift button ([6] button) to enter the number again.
CAUTION:
- It is not possible to return to the previous digit after shifting digits. If you wish to correct the number of the previous digit, proceed with the steps until after Step 4. and then perform input again.
- Please note that the execute button is not enabled until at least two digits have been entered
For Epson WF-C529R
1. Press and hold down the power button while pressing the [OK] button from the power-off state until a message appears on the panel LCD.

")
2. Enter ID number of Service Support Mode, and start the service support mode.
CHECK POINT:
- Enter “89109” when starting service support mode.
- Operating procedure
- Number input (move in ascending order): [UP] button
- Number input (move in descending order): [DOWN] button
- Input digit shift: [RIGHT] button
- Execute: [OK] button
")
# ID number input procedure:
- STEP 1. Press a number input button ([UP] button or [DOWN] button) to enter a number from 0 to 9.
- STEP 2. Press the input digit shift button ([RIGHT] button) to shift to the next digit.
- STEP 3. Repeat the above procedure to enter the specified ID number.
- STEP 4. When all of the ID number is entered, press the execute button ([#] button). A confirmation message appears.
- STEP 5. Press the execute button ([OK] button) to execute or press the input digit shift button ([RIGHT] button) to enter the number again.
CAUTION:
- It is not possible to return to the previous digit after shifting digits. If you wish to correct the number of the previous digit, proceed with the steps until after Step 4. and then perform input again.
- Please note that the execute button is not enabled until at least two digits have been entered
# Solution if enter and execute the wrong ID
- When a different mode starts:
If you enter the wrong ID and a different mode starts, there is the possibility of changing important settings of the unit, so press the power button to turn off the power immediately and then perform the process again to enter the correct ID number. - When non-existent ID number:
The following panel LCD display appears and the power is turned off automatically.

– Service Mode Menu Configuration and Menu Options, click here