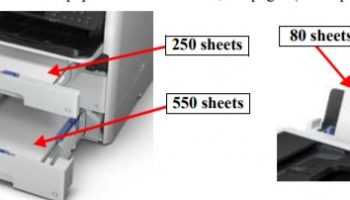
– To know more about Epson WF-C579, WF-C529 Operating Principles, click here
– To know more about Installation on Epson WF-C579, WF-C529, click here
– Connect Wi-Fi for Epson WF-C579, WF-C529, click here
Switching to the network settings screen
STEP 1. Switch the panel to the Home screen.
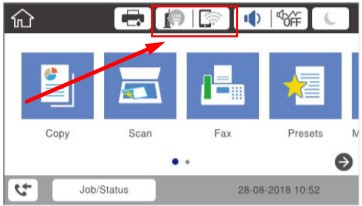
STEP 2. Tap the network icon.
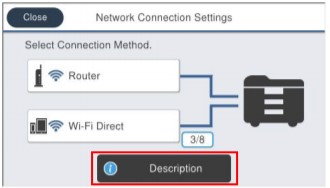
STEP 3. Tap “Description”.
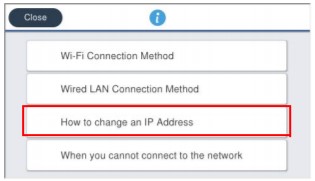
STEP 4. Tap “How to change an IP address”.
STEP 5. Tap “Settings”.
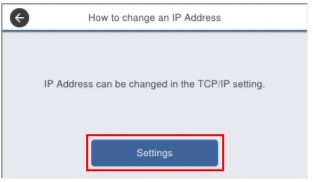
STEP 6. Check that the Advanced Settings screen is displayed.
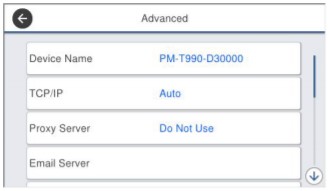
STEP 7. Select TCP/IP to start setting DNS server for the printer
Setting the DNS server on Epson WF-C579, WF-C529
STEP 1. Switching the DNS server setting method
- 1-1.If the DNS server is set to “Auto”, tap “Auto”.
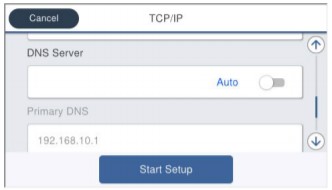
- 1-2.Check that DNS server is “Manual”.
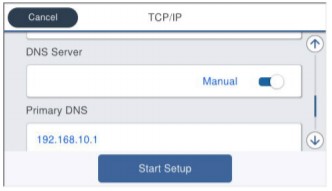
STEP 2. Setting the primary DNS
- 2-1.Tap the IP address of the primary DNS.
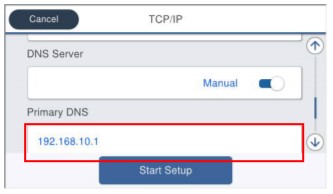
- 2-2.The software keyboard appears. Enter the IP address of a primary DNS server based on the hearing sheet.
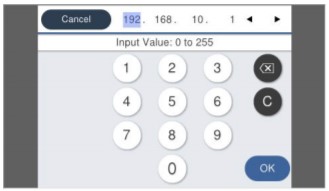
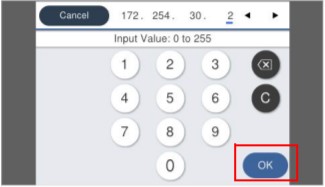
- 2-3.When input is complete, tap “OK”.
- 2-4.Check that the primary DNS setting has changed.
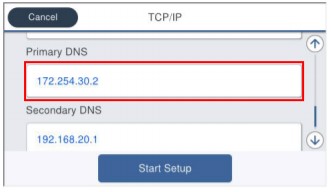
STEP 3. Setting the secondary DNS
- 3-1.Tap the IP address of the secondary DNS.
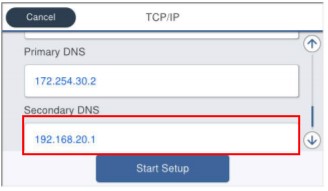
- 3-2.The software keyboard appears. Enter the IP address of a secondary DNS server based on the hearing sheet.
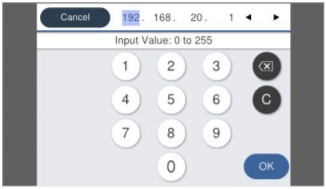
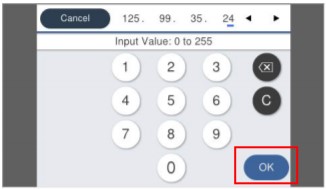
- 3-3. When input is complete, tap “OK”.
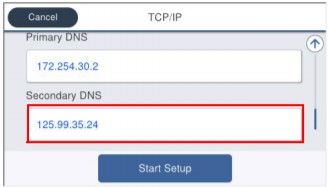
- 3-4.Check that the secondary DNS setting has changed.
STEP 4. Saving the settings
- 4-1.Tap “Start Setup”.
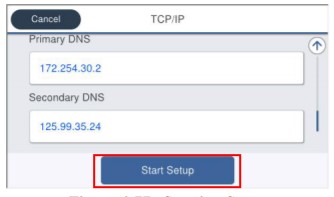
- 4-2.Wait until the settings are reflected.
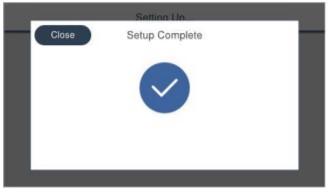
- 4-3.Check that the Setup Complete screen is displayed.
– Epson WF-C579, WF-C529 IP address Settings, click here
– Epson WF-C579, WF-C529 set static IP address, click here
– Setting a proxy server on Epson WF-C579, WF-C529, click here
